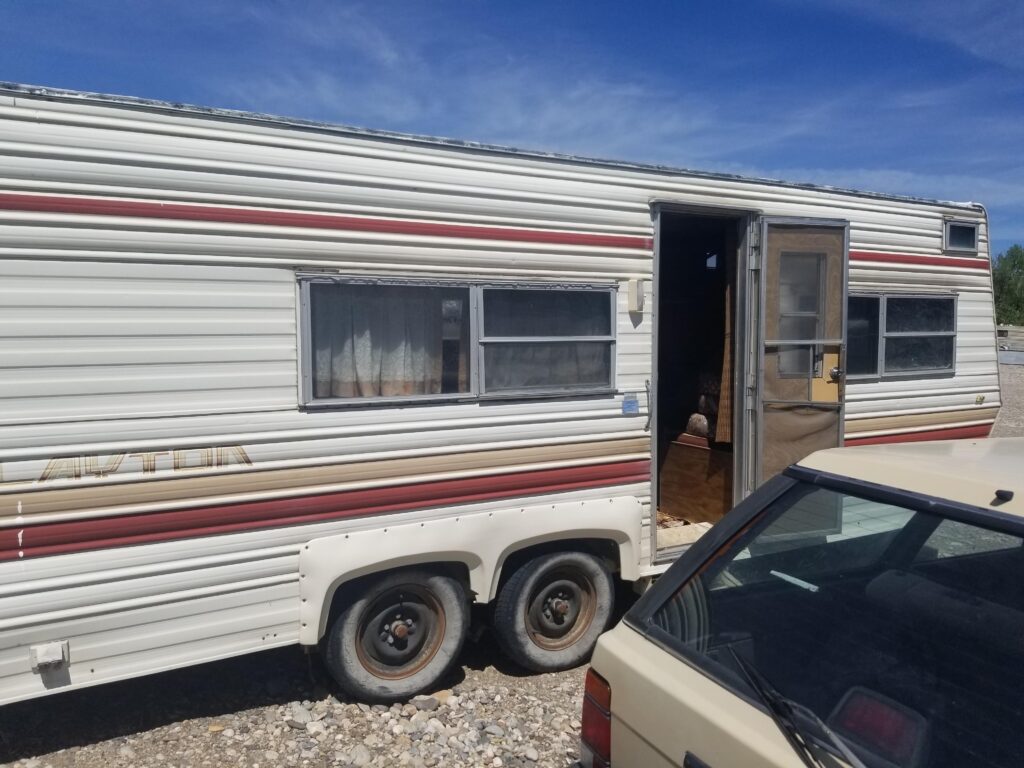
I bought a 1979, clapped out, “really nice and clean” Layton Travel Trailer in late May of 2021. Originally advertised as “ready to go, just needs the stove hooked up”, I soon realized that that was the least of my worries. Naturally, I bought it and resolved to pretty much renovate the entire thing. This page is that journey, one weekend and evening at a time.

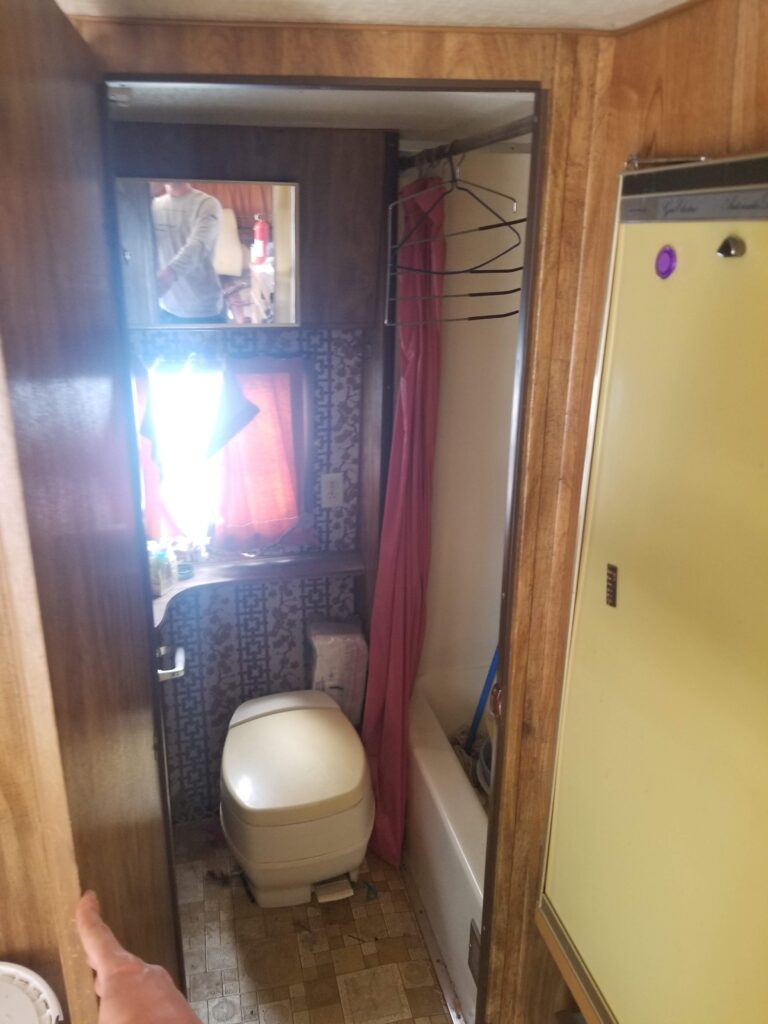
I started by doing a damage assessment. It’s a lot more work than I thought, fortunately no nasty smells to be concerned about just yet. I did note a rather disgusting bathroom with a suspiciously spongy floor, however.

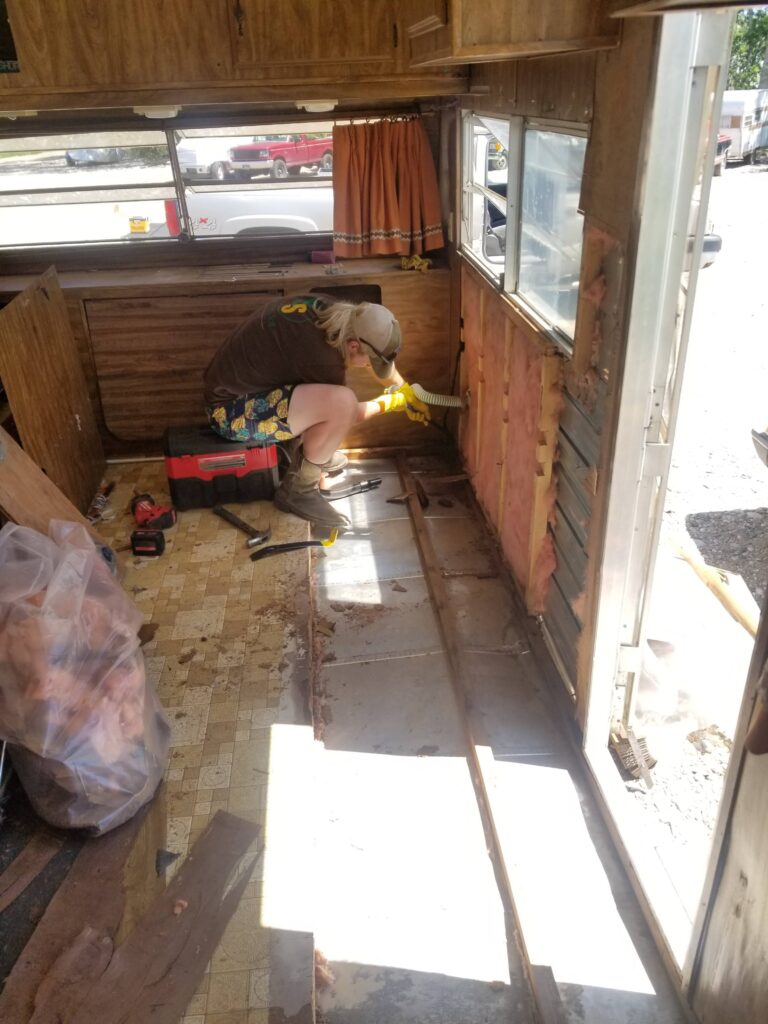
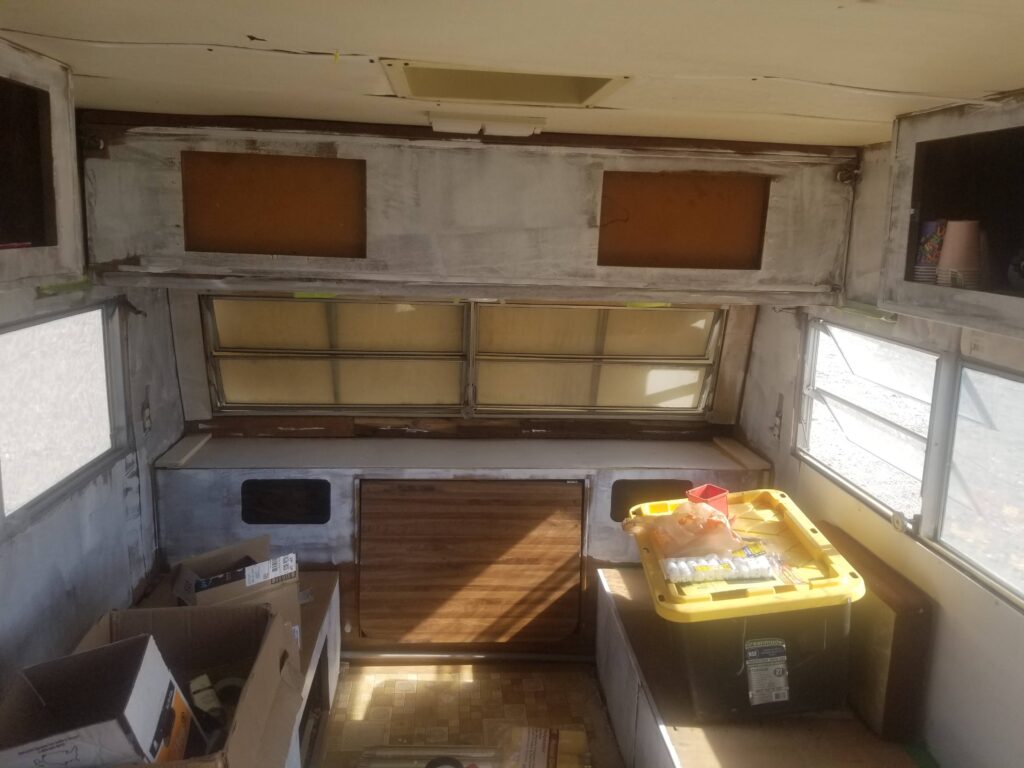
Turns out, about half the floor in the main space. was rotting and had to go. After I removed the right bench (see above, center photo) while chasing what I thought was a small patch. Under this bench was also the (presumably original) 45 gallon fresh water tank. Originally, I thought this had been leaking but it turned out to not be the case. Either way, that tank was getting replaced!
I also had to remove the walls and some insulation where water had intruded as well. Several 2×2 frame components were rotted out- those had to be bashed and cut away.
During the floor removal process, I noticed the step had become “indented”. Inspection revealed that the disgusting rotted subfloor was the only thing holding a dinky 3/8 carriage bolt that held the majority of the step up. When we removed it, the bolt (also rusted) suddenly had slack so the step gave way, held uponly by the moderately better other side and shoddy welds to the frame.
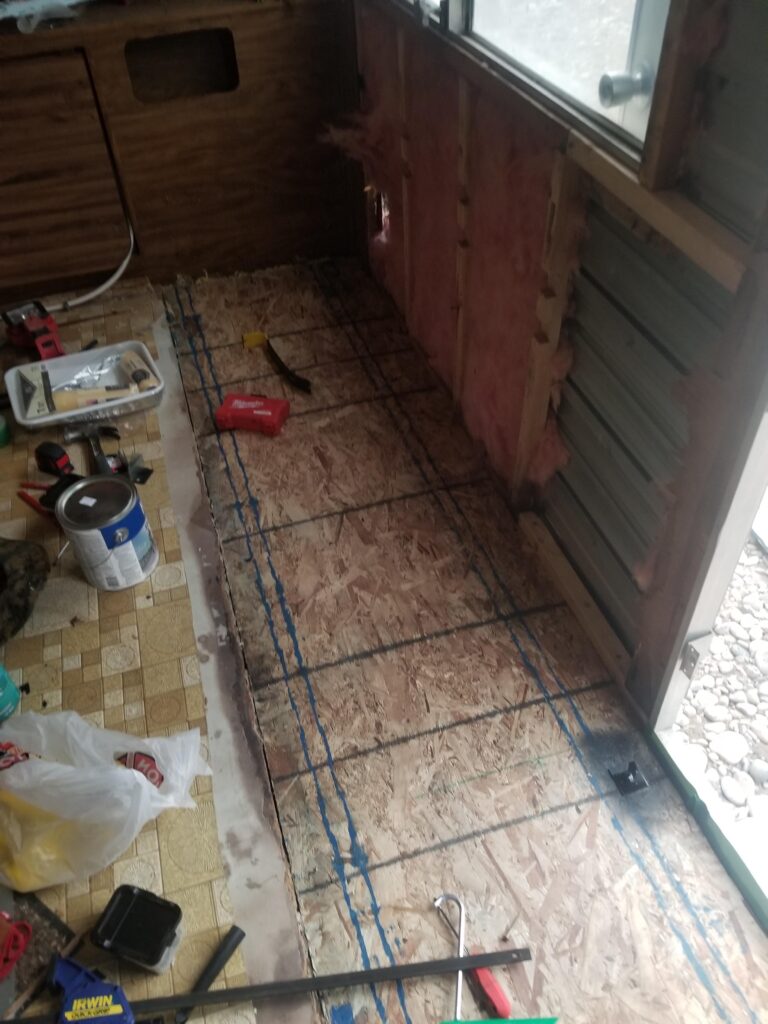
I put in new subfloor with 1/2″ OSB that got glued and screwed.
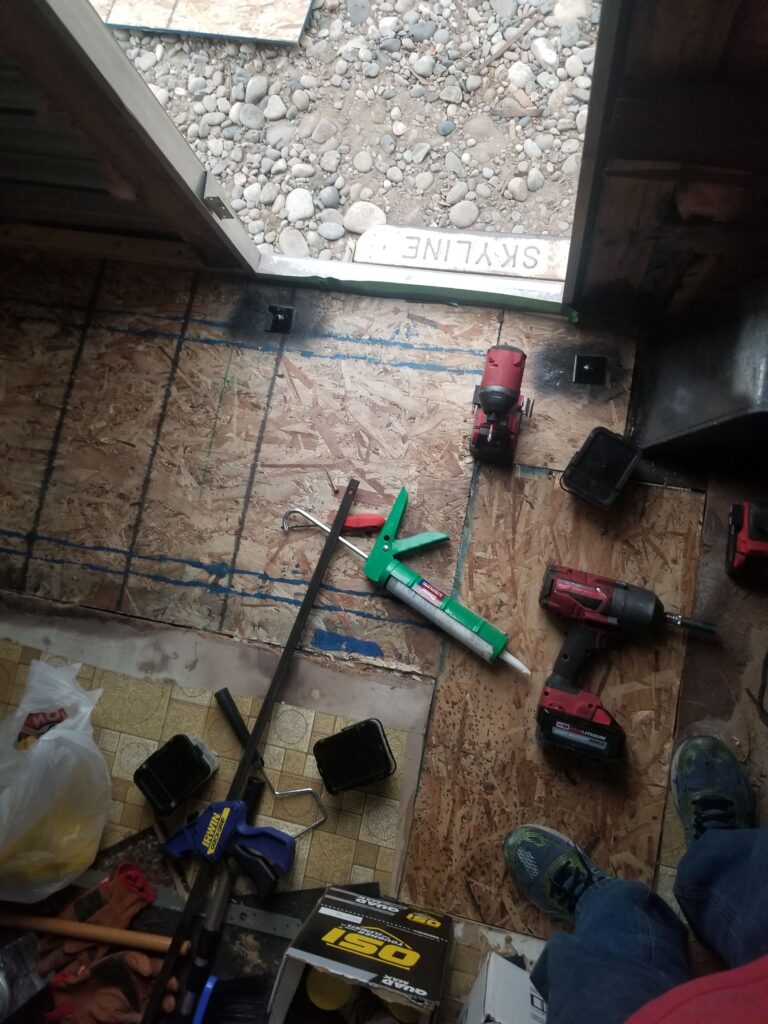
Turns out, with steel bearing plates I could make a super sized washer for the new step bolts to spread their load onto. It’s now stronger than from the factory, I think.
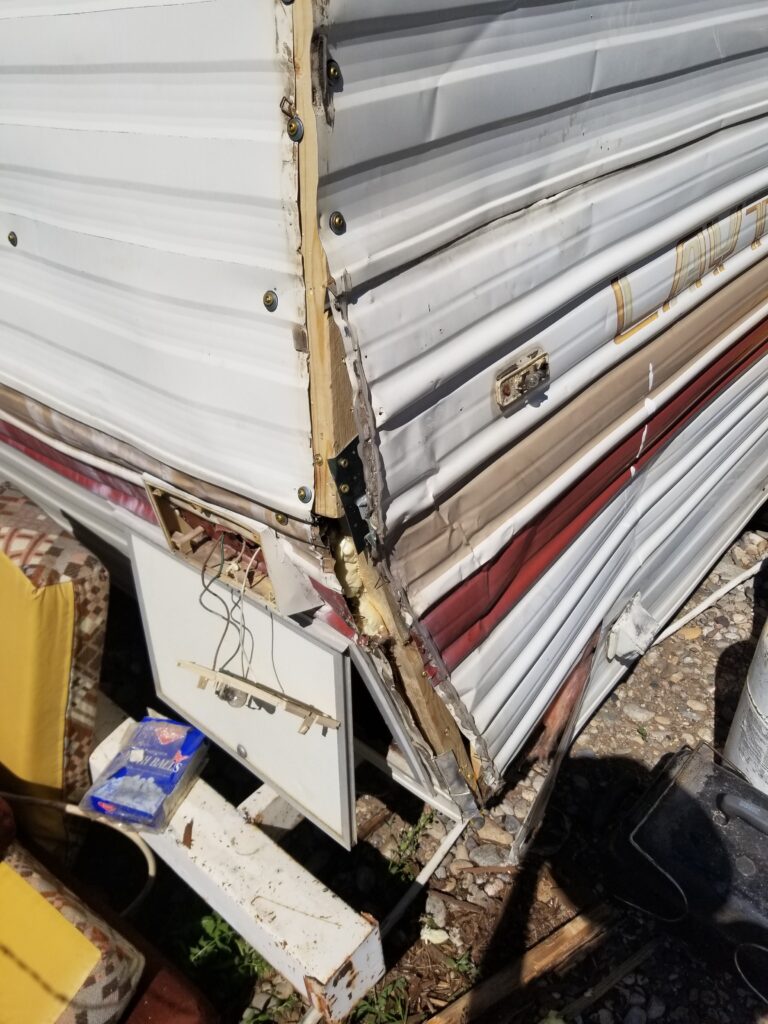
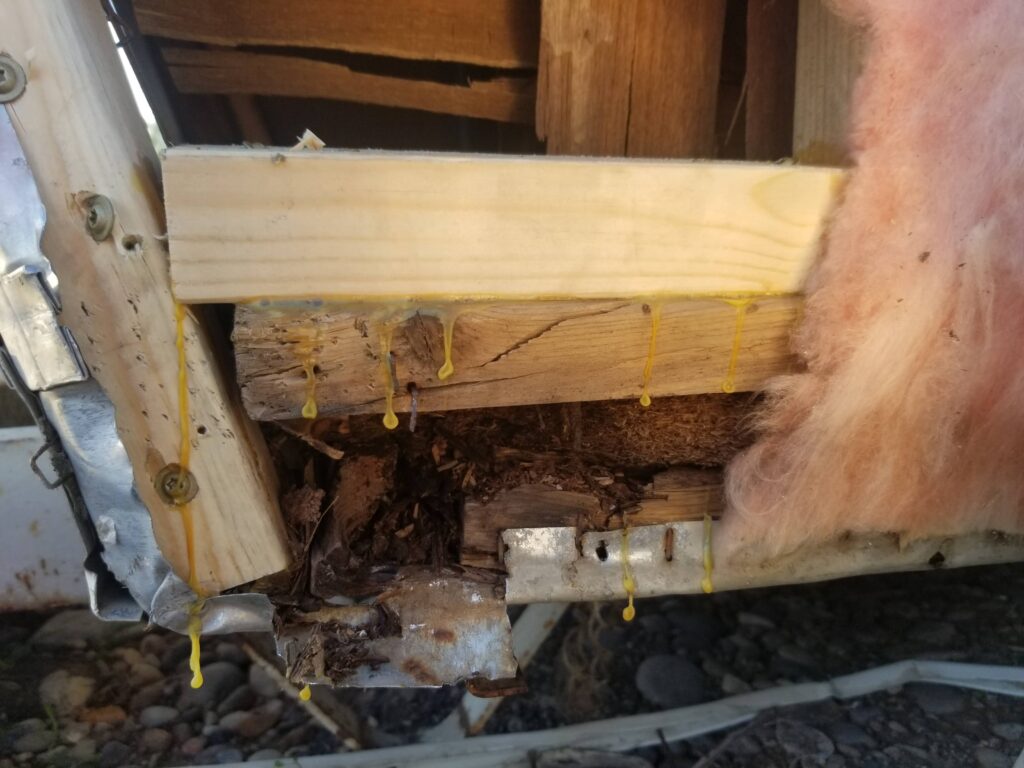
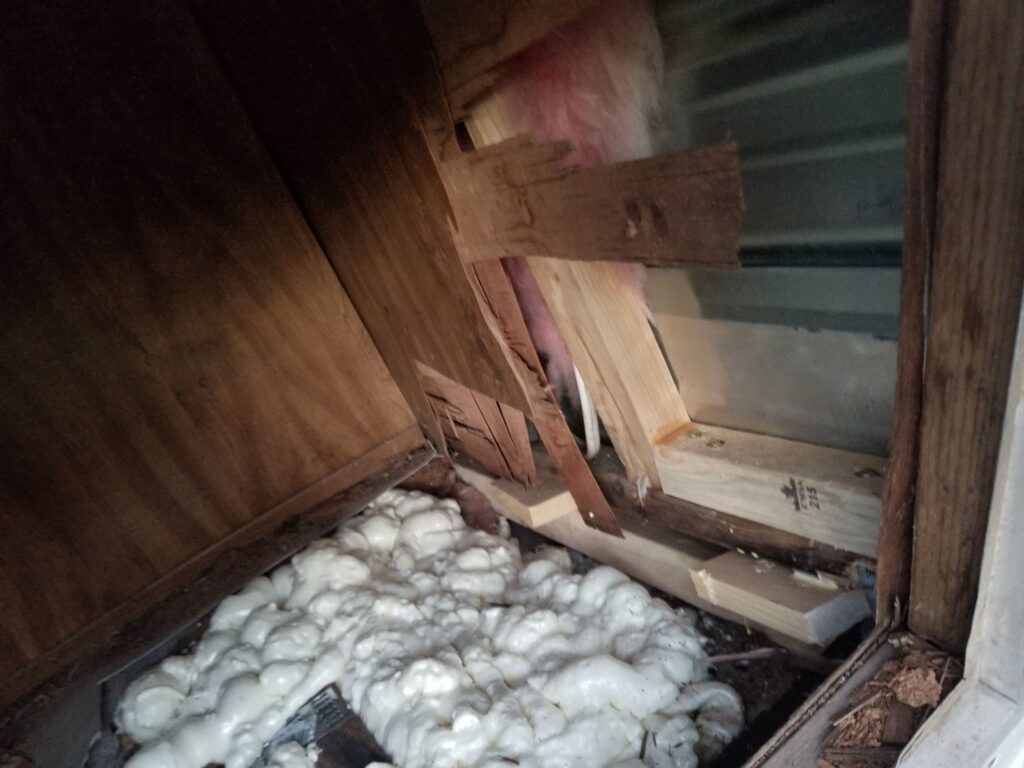
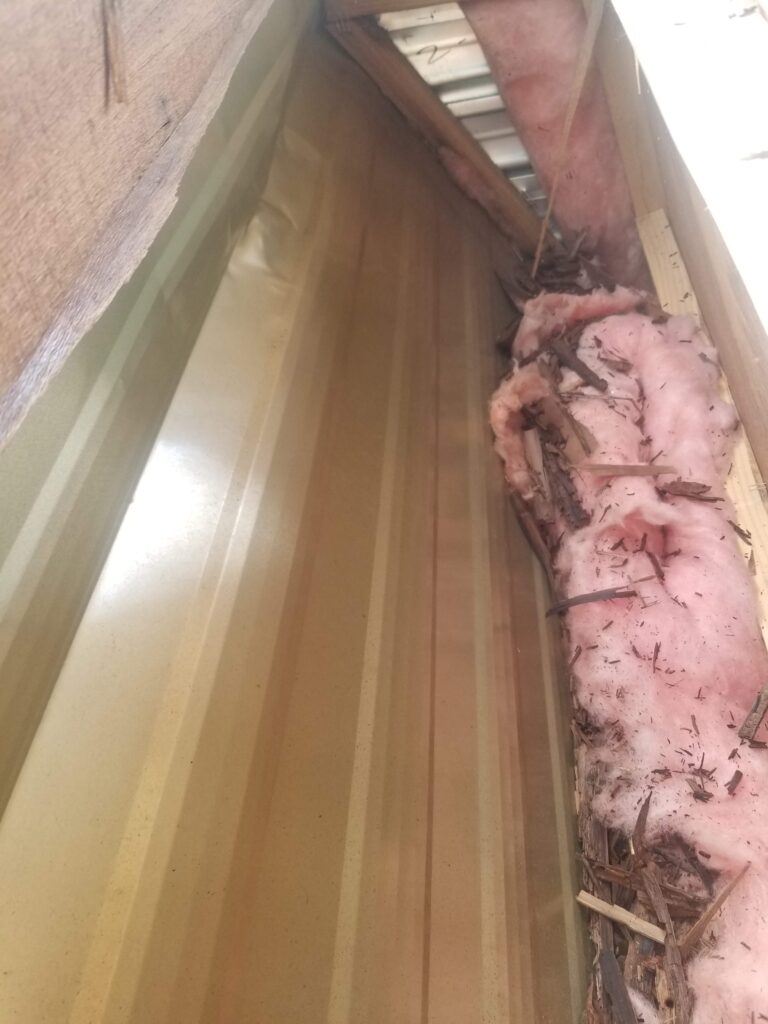
At this point I noticed some rot on one corner. No big deal right? Remove the trim piece, maybe replace a 2×2 oddly positioned so as to give the trailer’s rear a curved shape. Nope. I ended up replacing the entire corner, and redoing framing from there extending about 6′ out in either direction. This corner was terrible, horrific, even. Odd corners, rotted boards, and tight spaces. Oh, and not to mention the fabled forbidden cotton candy covering everything. The bonus storage space back there ended up spray foamed and totally useless now, in favor of added reinforcement to the rest of the trailer. If the trailer gets blown up, this corner will still be there.
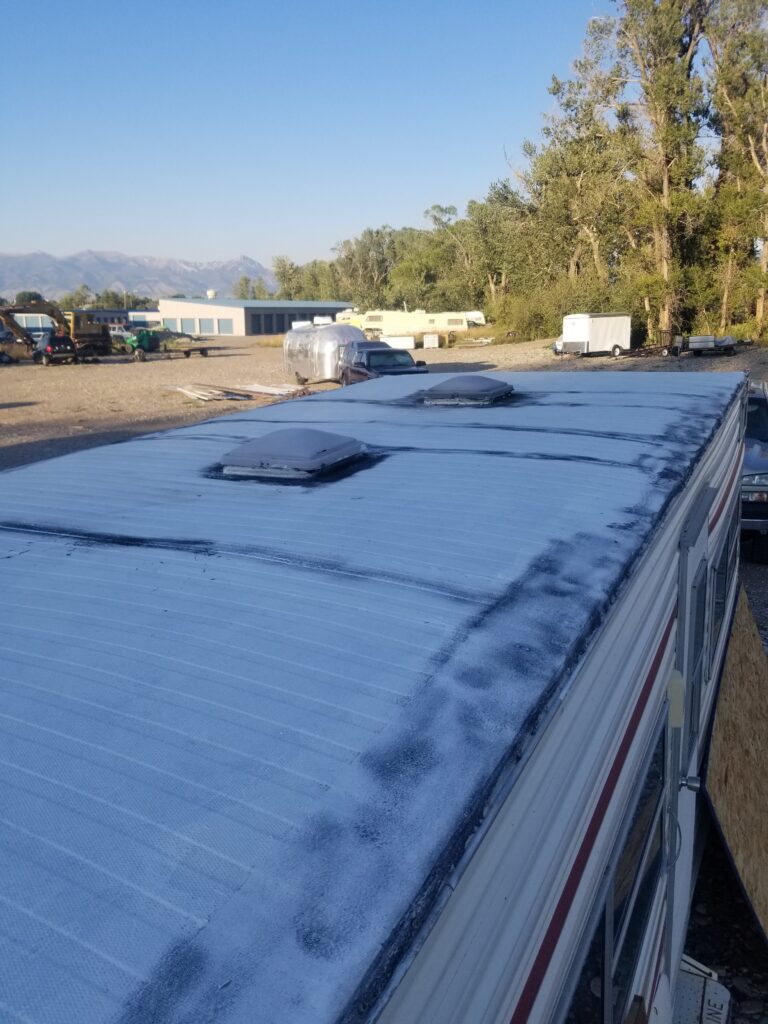
At this point, I realized I really should address the roof, though I swore to myself early on that I would not, save for extreme circumstances, mess with the ceiling. It didn’t leak, I thought, so why bother, as it’s only cosmetic. After extensive Google-foo, it became clear that I should probably recoat it regardless. $20 later I gave it a good thick coat of elastomeric roof coat. Not until I had left the can to dry and gone home did I realize I should have closed the can to do a second coat the next day. Part 2 of the recoat journey to come. I also hit several spots with clear Through the Roof sealant.
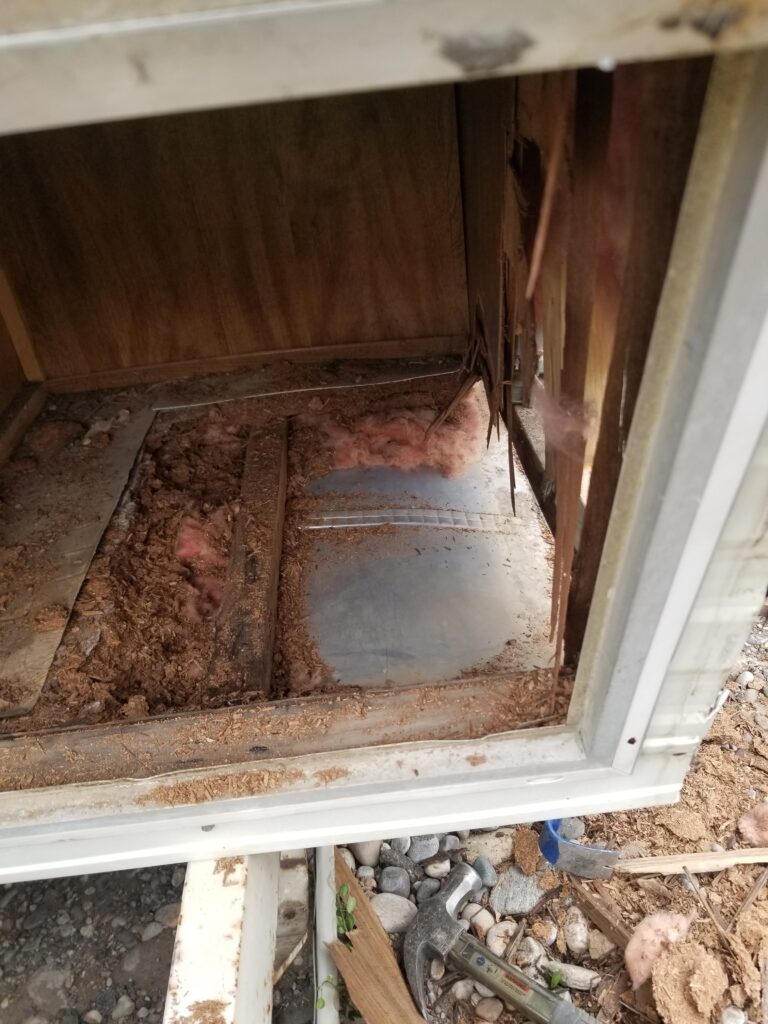
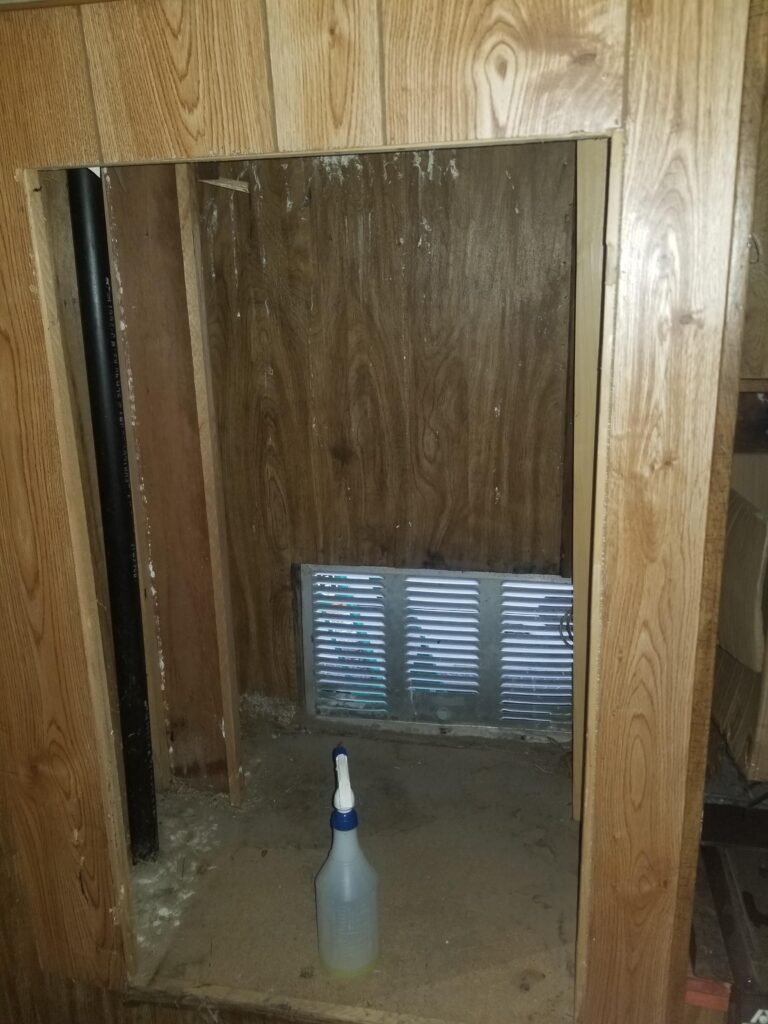
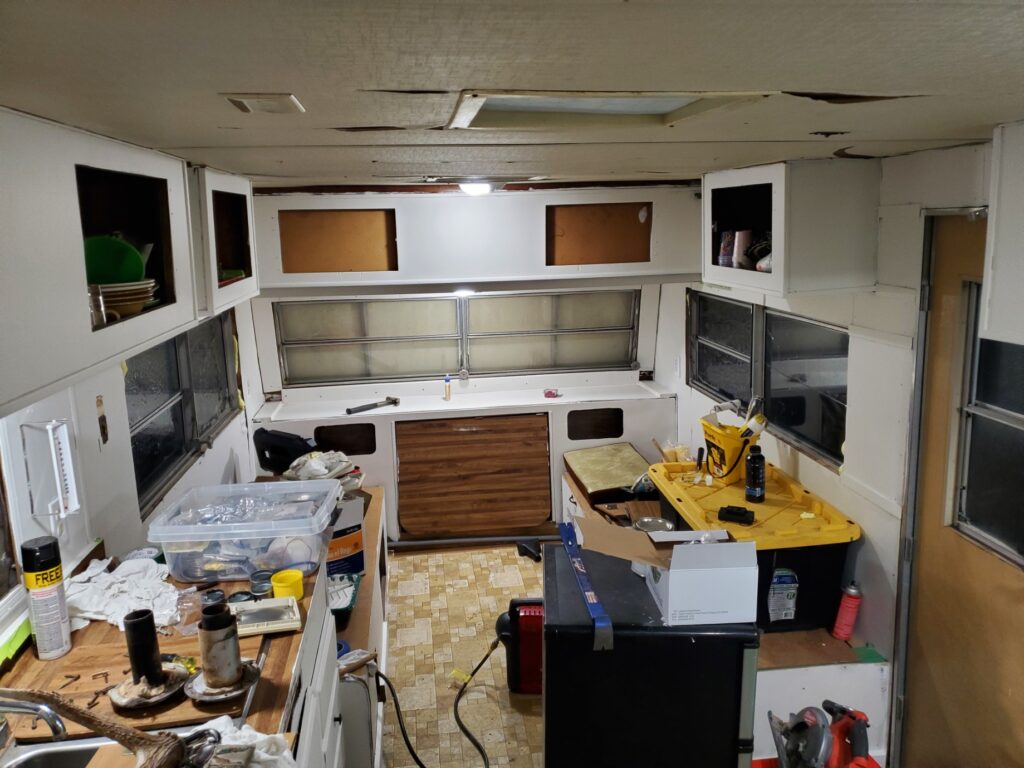
Finally, I turned my attention inside once more and kicked it into high gear. The nasty old fridge? Gone. Mold and festering mildew? Treated. Countless crevices and air pockets were filled with foam to protect not only from moisture but also to help insulate and reduce any drafts. Removing the fridge itself was a half day’s nightmare. Besides weighing well over 100 pounds and literally not fitting through the door, immediately after removal it became apparent that several local crows had taken up residence above and to the left of the fridge. They also had turned this area into a gravesite of sorts, as there were no less than four encapsulated in the nests. Since I didn’t want to run an electric fridge constantly and propane units are woefully inefficient (I have two 40 gallon tanks but still), I elected to turn this cubby into a pantry complete with an outdoor storage compartment as well.
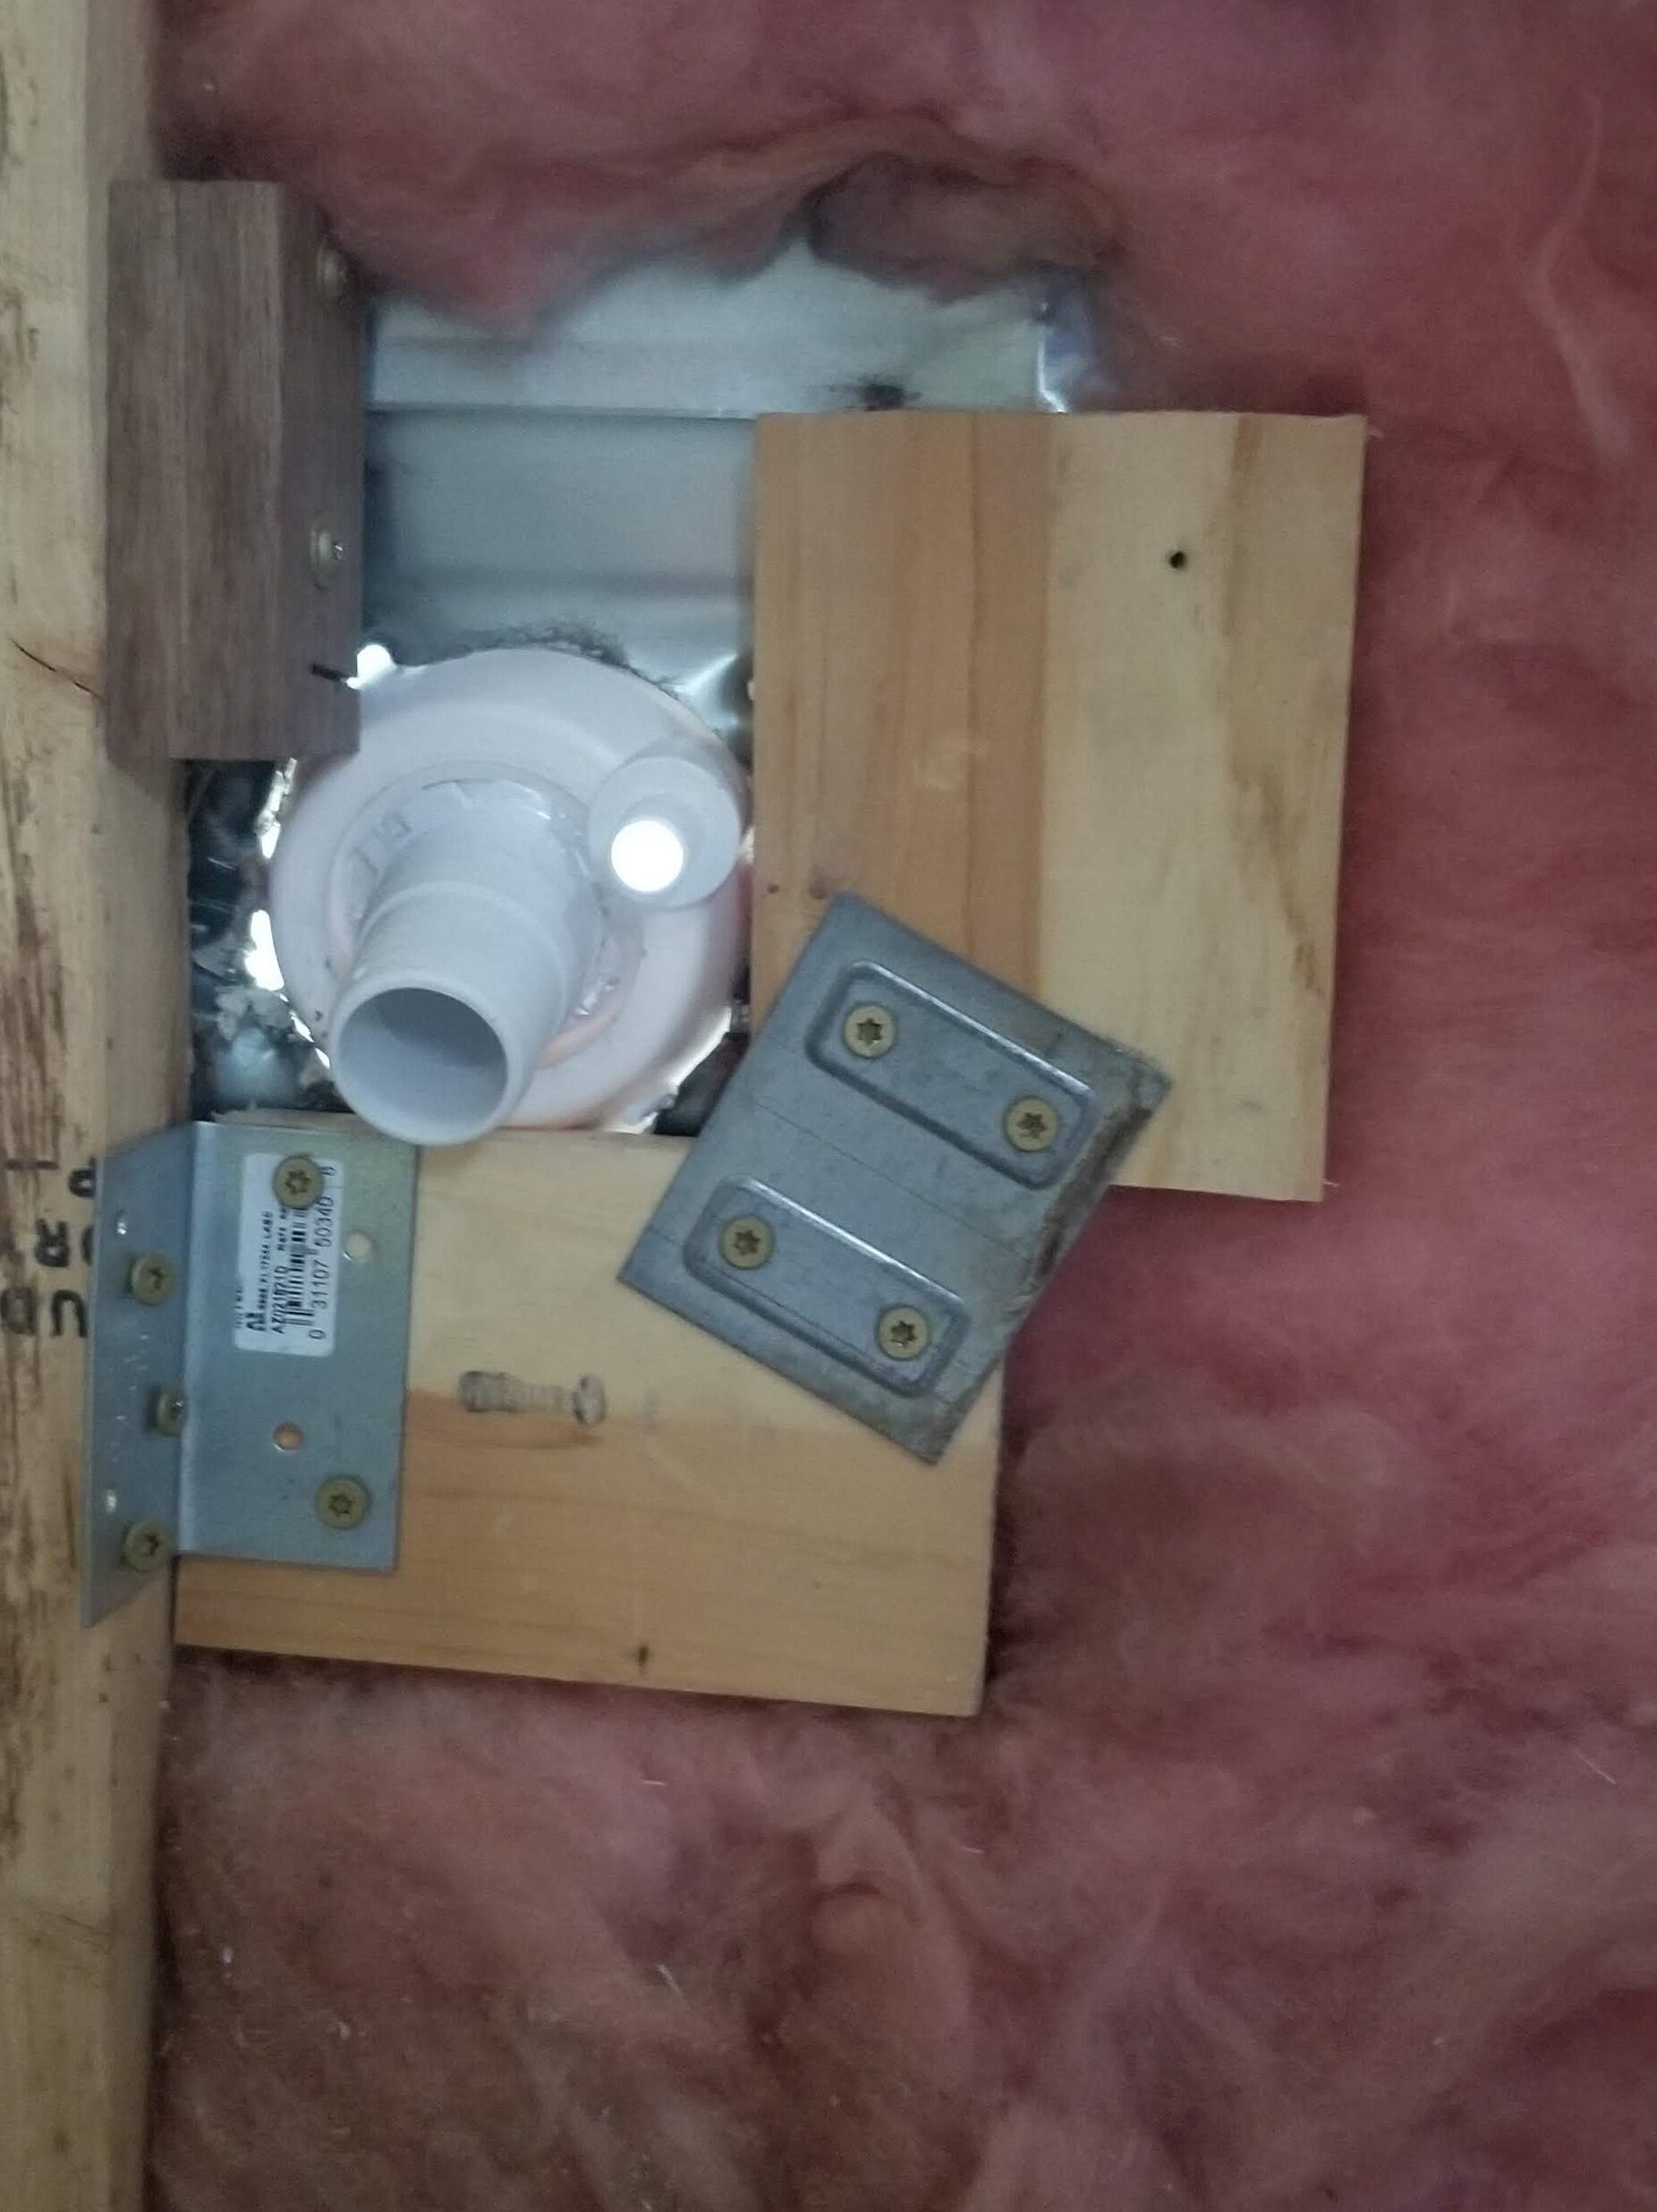
My worst work yet, the new fill port.
Judgement, please
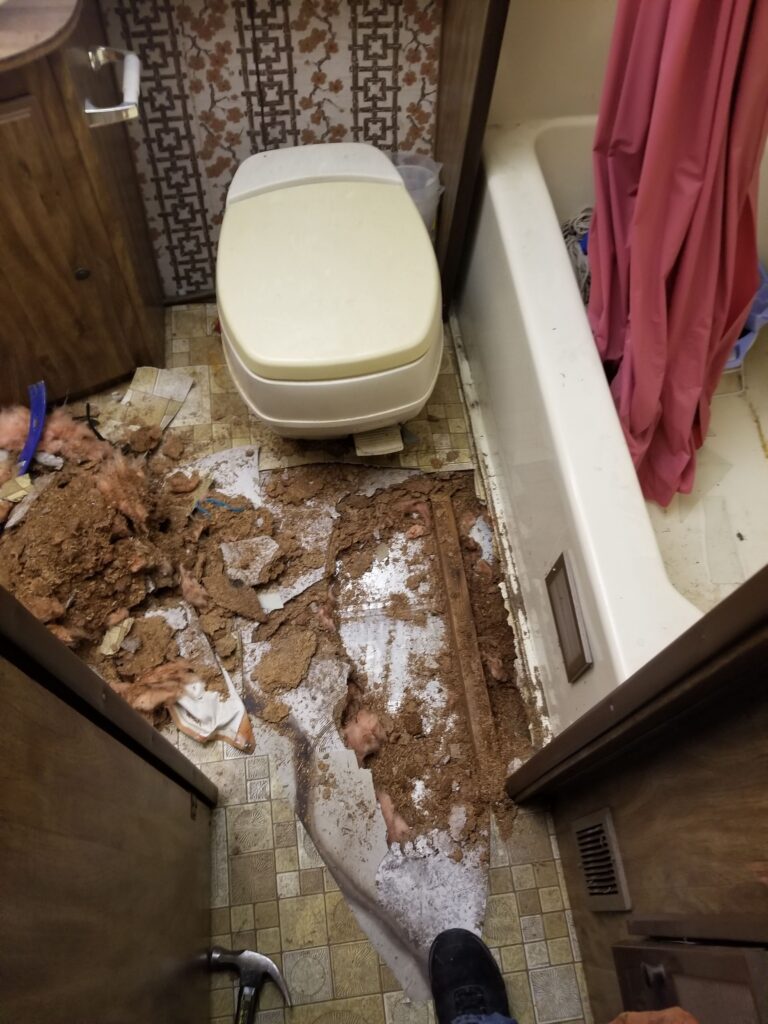
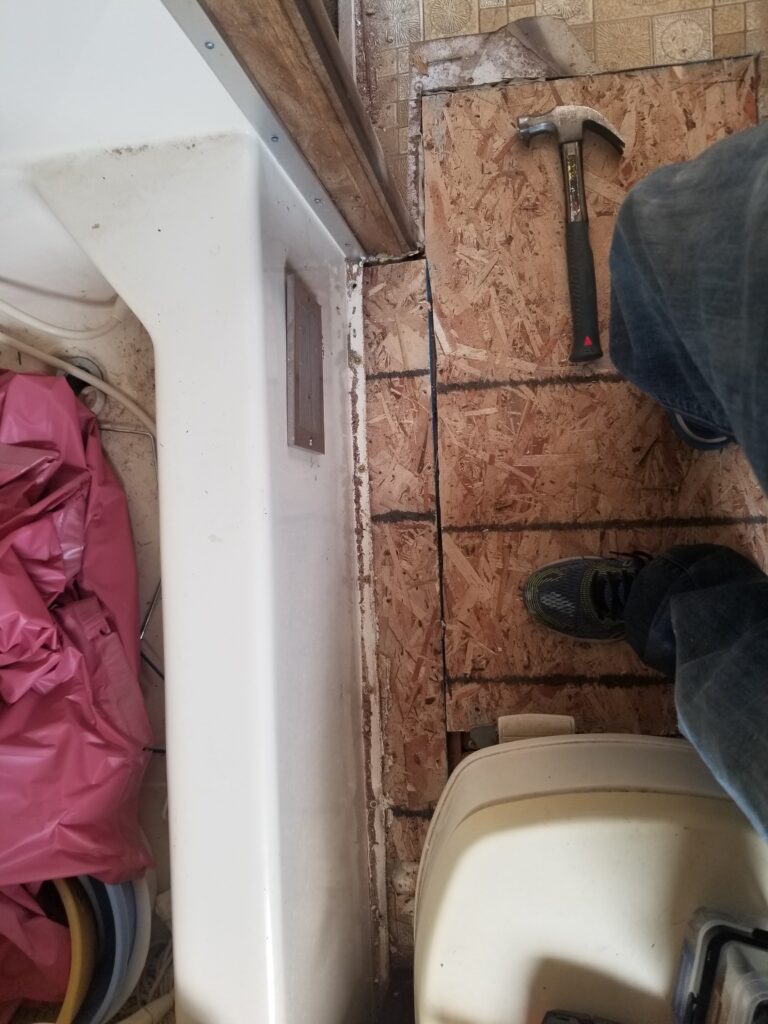
At some point I figured it was “now or never for the bathroom to be attacked head on. I busted into the floor, knowing full well I was probably going to have to pull that toilet and replace half of the floor (at least) in the bathroom. Fortunately, it seems that the damage was caused by water intrusion from the shower, and it didn’t extend into the main room. Unfortunately the damage did extend under the tub so reinforcement was added after I scraped what I could out from under it, and added back new foamboard and spray foam in the gaps.
In the future, I plan to rip out the tub-shower and replace the flooring underneath it. I’ll probably install a normal fiberglass shower, but may end up with a tile one.
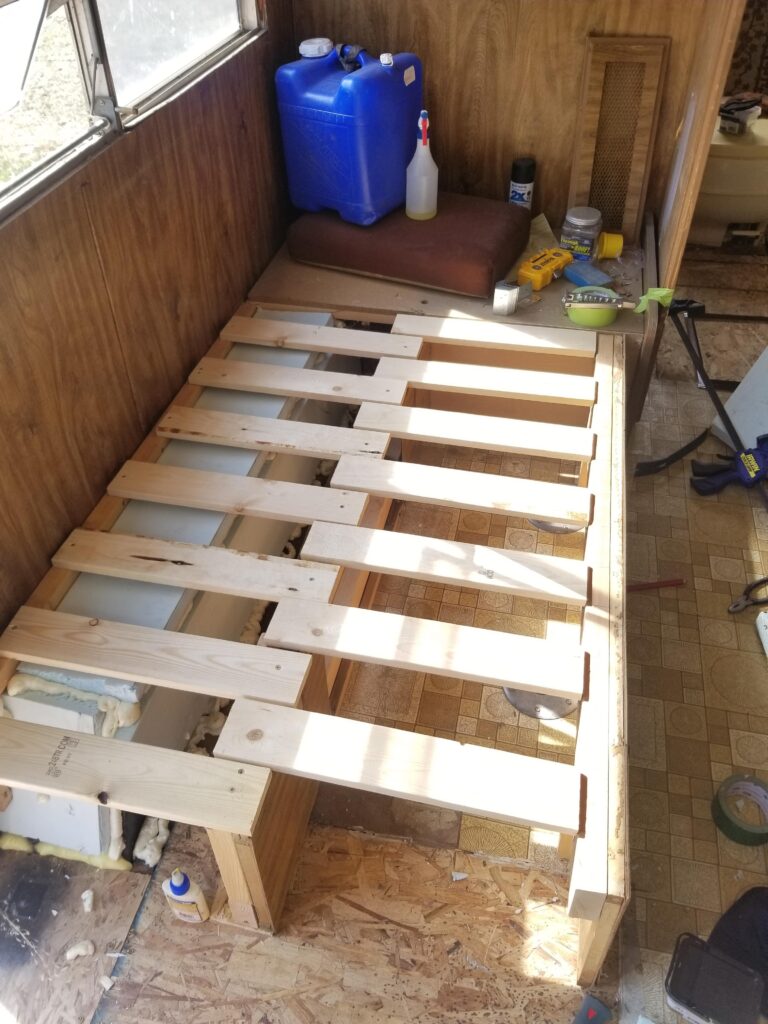
Next, it was finally time to start putting some things back together! I started with the new water tank as that needed to go in before I could rebuild the bench-beds.
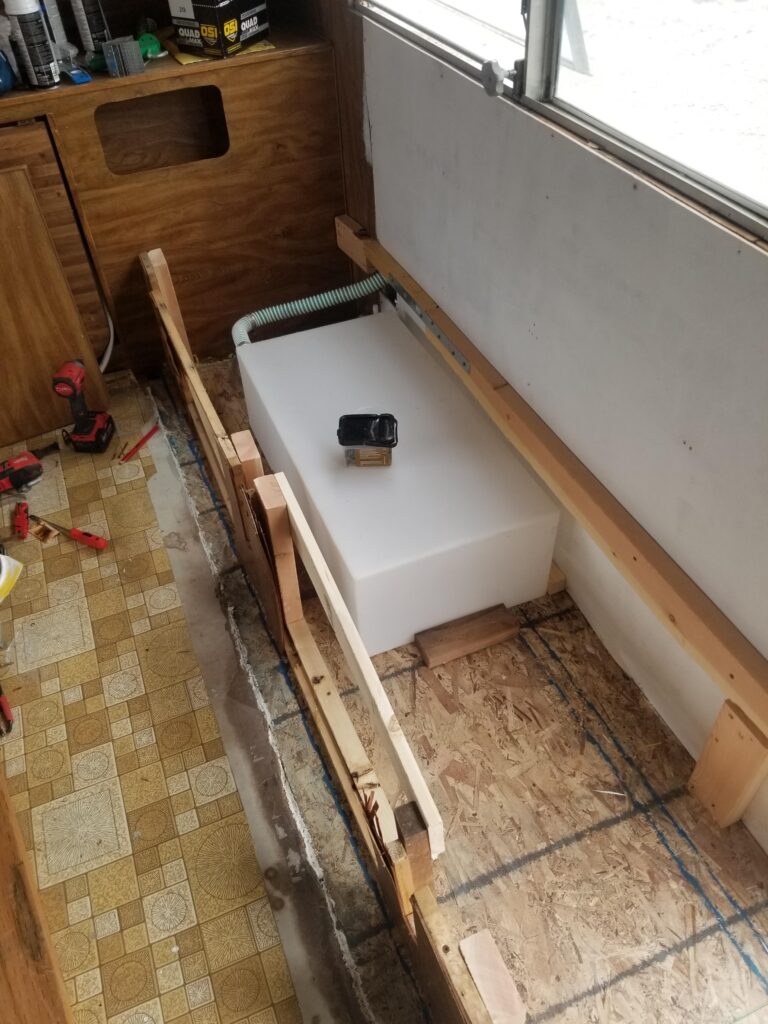
At this point I also pre-primed the wall behind the tank, and started to add in the framing needed for the bench that was going in. Each bench (two) was the same dimensions as the original, just with greatly added structural support and new handles for ease of use.
In the photo is shown the first iteration of the front bench- I ended up redoing it completely to make it more sound.
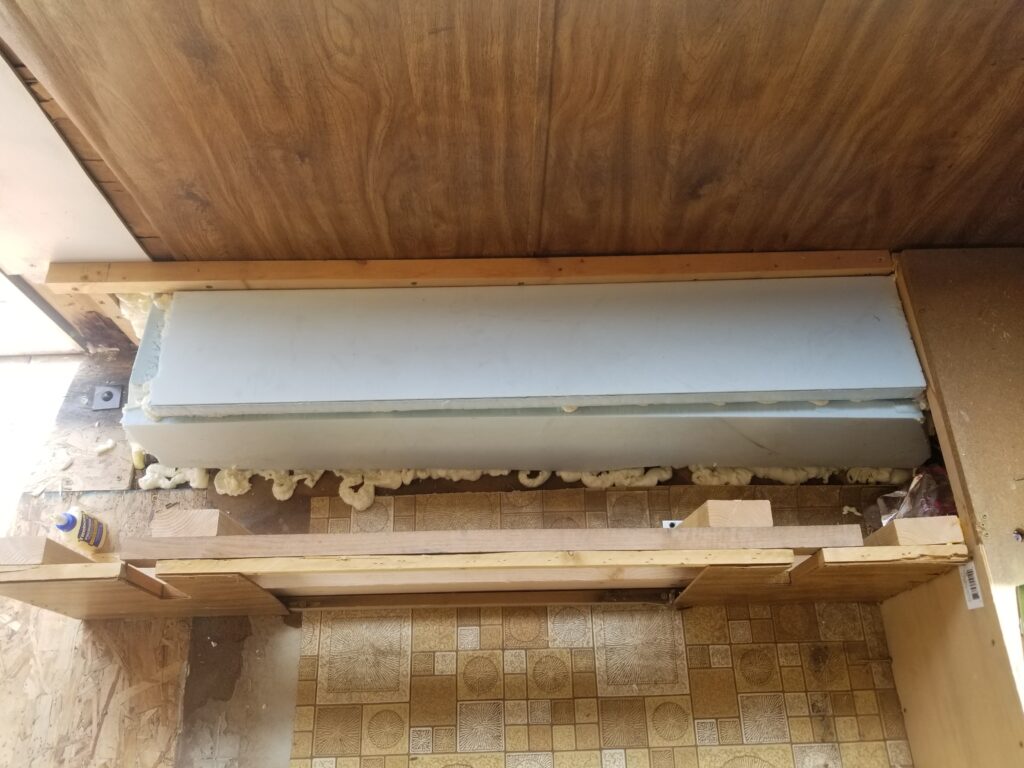
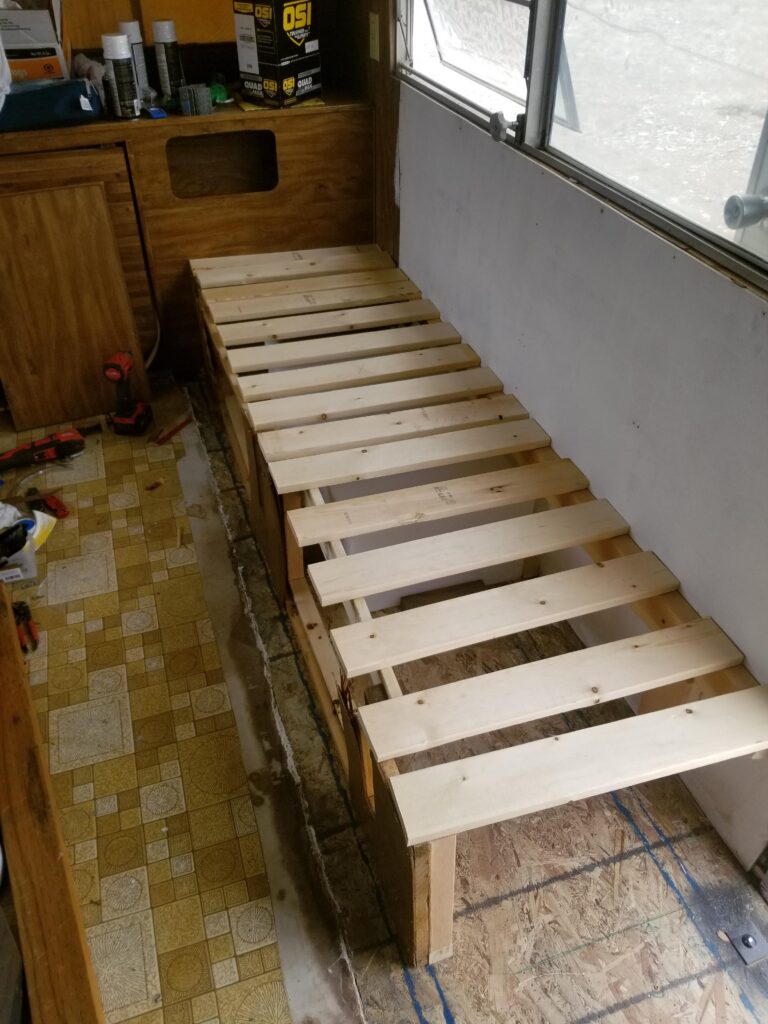
I reinsulated the wheel well area with foam, and started framing out the new bench. I got the design from an online post – it ended up being much simpler and robust than the other one. The “interlocking” 1X4s slide together for bench, and come apart for bed mode. The bed is a little over 6′ long to accommodate most.
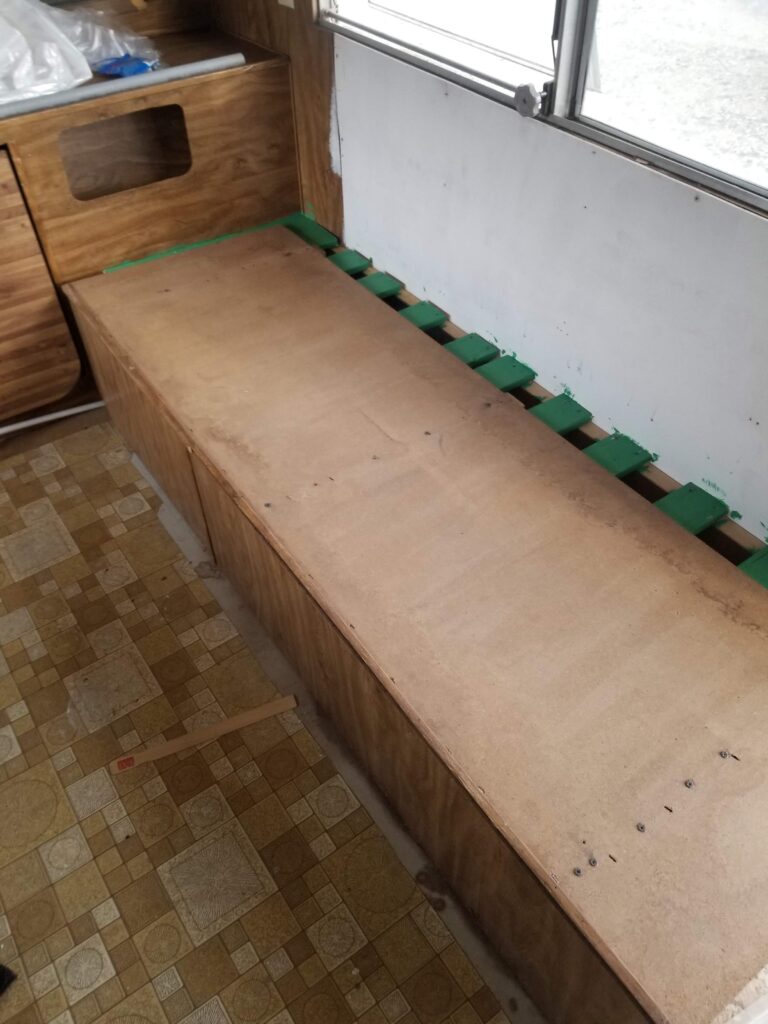
Next, I framed out the other bed as well, this time reusing most of the existing upper portion to save time and money. I did, however, coat the particle board in polyurethane to help keep down any stray VOCs and add protection to the board underneath.
Finally, I thought initial renovation of the trailer was almost done. NOPE. The front shelf had some sponginess in it, so I ripped in. Turns out, the entire front around the window was rotted. Unfortunately, this meant reframing the entire thing which ended up being better except I had to take another trip to acquire more lumber and foam to reinsulate it.
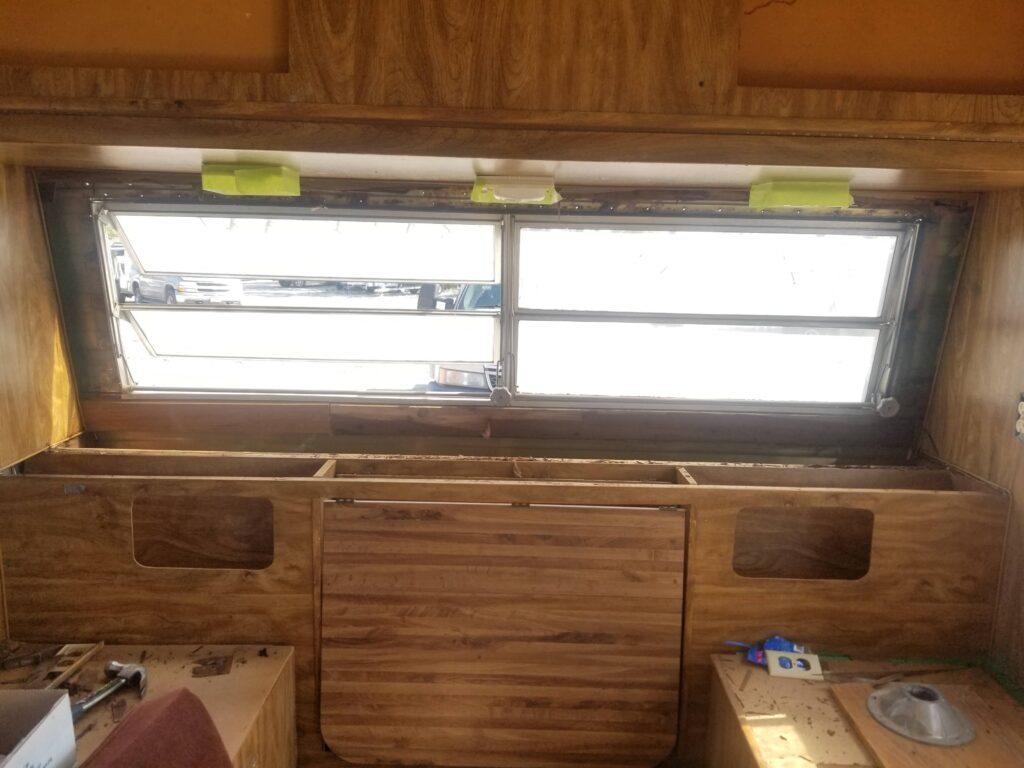
The space behind the front shelf and below the main window was completely collapsed- there was an entire 1X4 back there that has simply rotted out of place. I assume it originally held up the insulation batts. I removed most of the old insulation, and replaced with new foam board.
The finished front looks much better and is significantly more stable. I also primed almost the entire interior with a bonding primer- it already looks much better just primed. I still need to add one more trim piece to the bottom of the window in this photo.
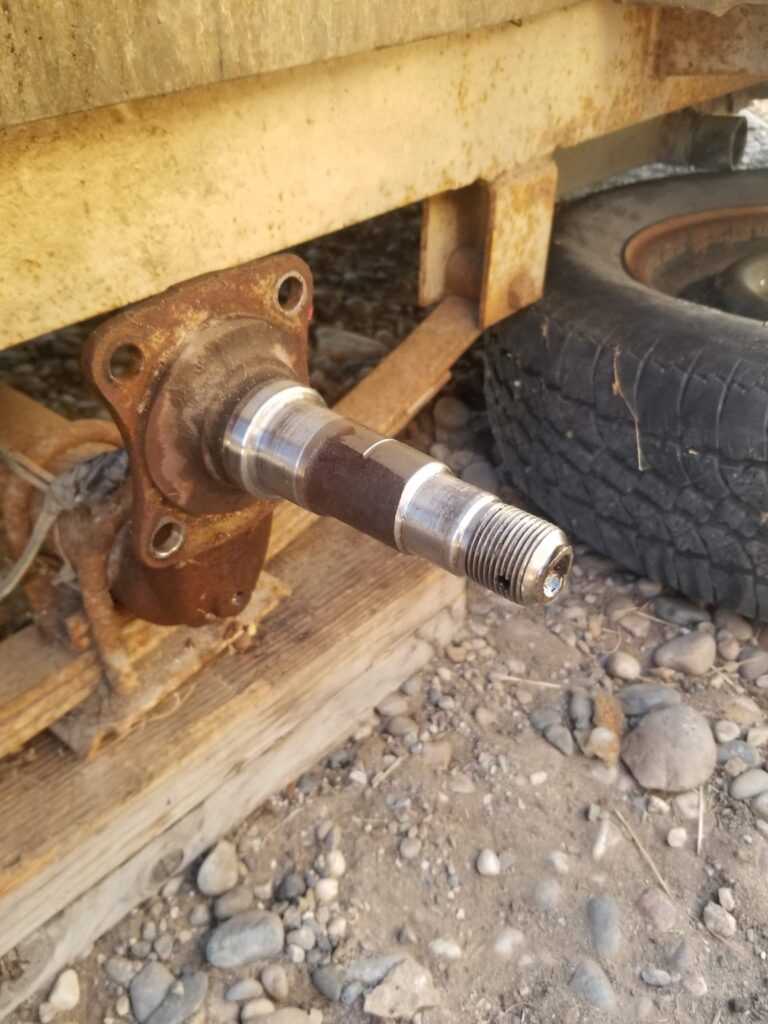
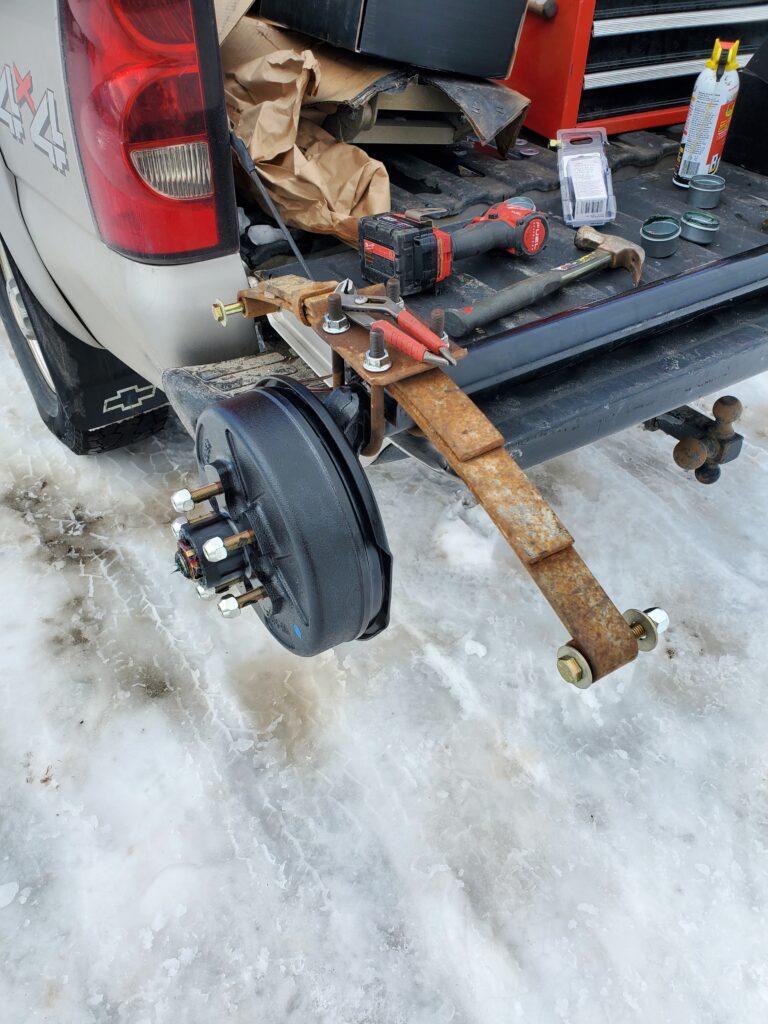
The wheels. A trailer is really simple when it comes to the drivetrain portion (if you can even call it that). There’s two round axles and four wheels, each with a simple electric brake and bearing mounted to the spindle. The spindle is the shiny cylinder piece coming off the rest of the axle. That ground-down black part? Not supposed to be that way. Somehow the bearing failed in such a way that the wheel started to grind into the spindle itself, creating an awful grinding noise and making it extremely dangerous to pull. Unfortunately for me, this means I must replace the entire axle-which naturally is backordered.
Propane time! As seen in a later (to be written) section, the axle of the trailer turned out to be a long, painful, drawn out affair. It ended involving a wrong sized one, a welding shop, and several shipments from Texas and Michigan to replace everything.
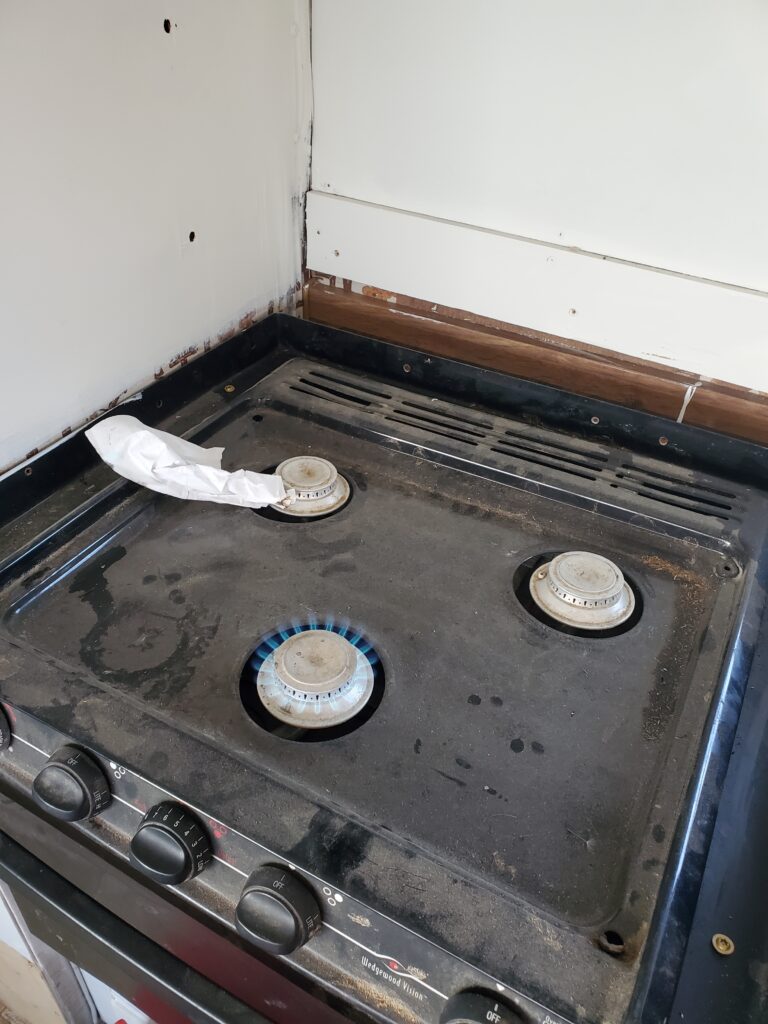
Anyhow, I got around to getting the propane mostly hooked up, by use of a nice 2 tank combination regulator switcher unit. I also leak tested the stove and fired it up.
Next came the heater. This also became a drawn out process, as the furnace built in turns out did not work (surprise surprise!) I ended up switching to a Camco catalytic unit, which in retrospect is a little small for my use but does help warm the trailer above freezing. I’ll probably add another supplemental one as there’s an empty spot on the manifold that I capped where the fridge went.
On the photo below, notice the orange glow coming from the new heat unit.

Finally, after a long wait and lots of mismatched parts, the day came to assemble and install the new axle. Frankly, I’m not sure quite how I installed the new axle as it was heavy, to say the least.
Getting one half installed was fairly easy, the other half though took several hours of pounding, bending, and finally using ratchet straps to pull it into place.

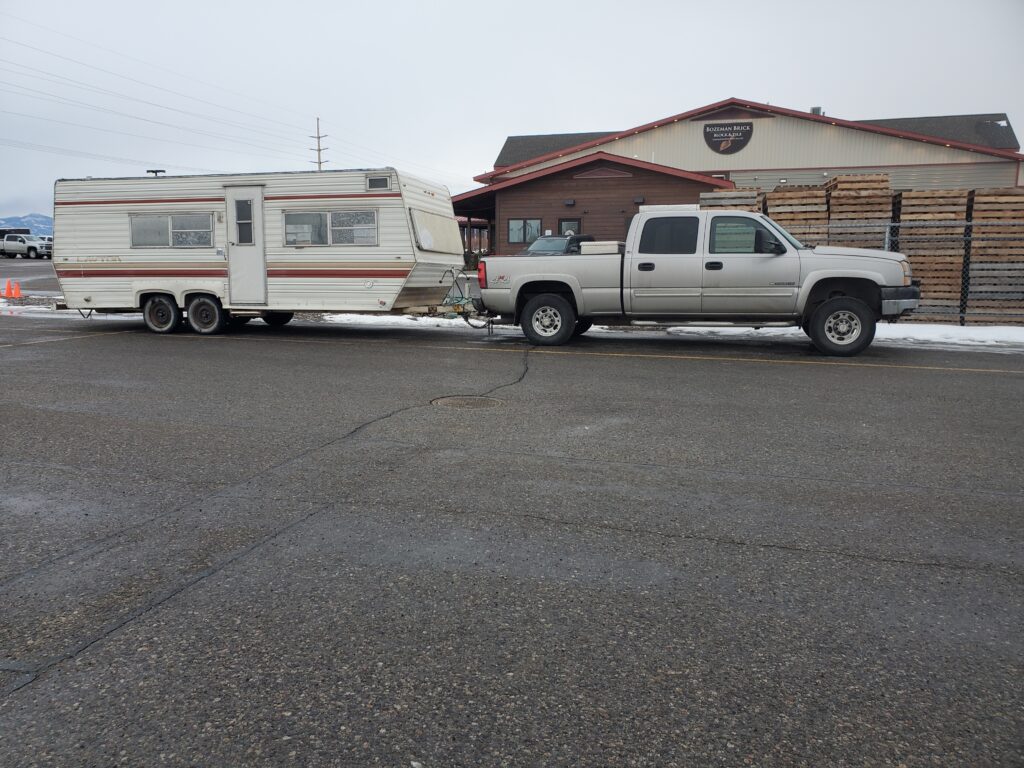
Finally, (after a quick change of clothes as I had been literally rolling in mud), it was time for a test drive! I drove around the block to discover 1) that this thing pulled really well, and 2) it really did need tail lights. Either way, after 9 months of work, I had a rolling, easily usable trailer. The next order of business was to go on the maiden voyage.
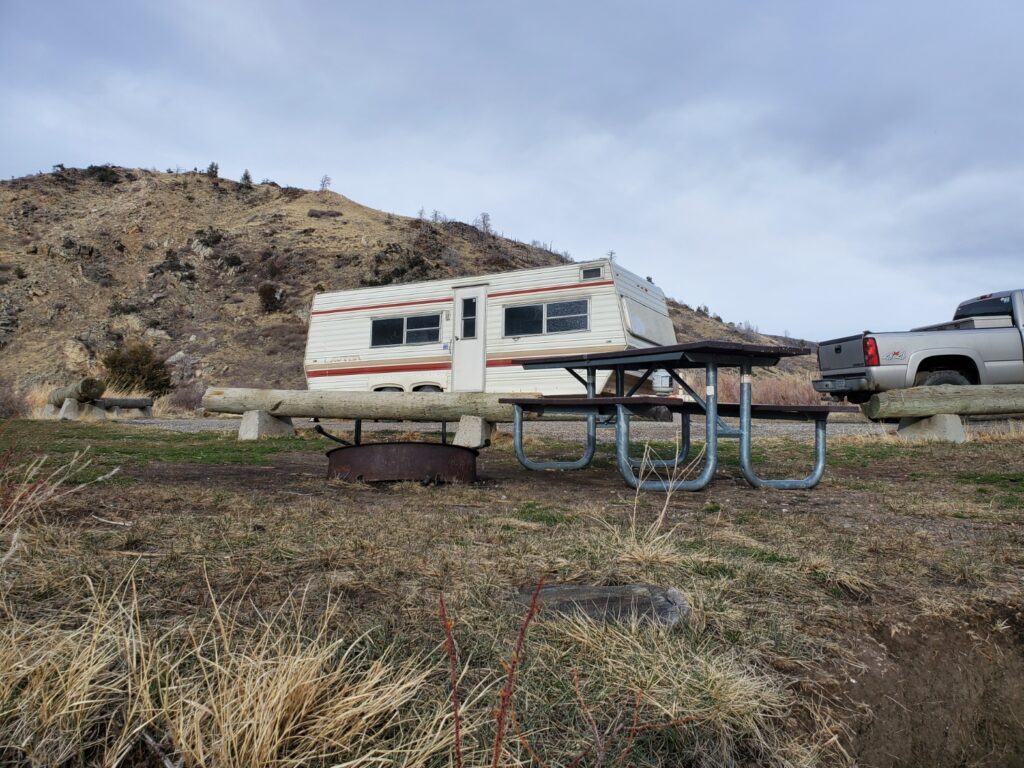
For the first trip, I chose to head out to the Beartrap canyon, right next to the Madison river. I took all backroads, (some being really curvy) and it pulled absolutely fine. Yes, it needs some electrical work done. And yes, one of the tires is a bit low on air. At the end of the day, however, the first trip was a success!
Additionally, I got the interior lights working with new LED modules- these put out substantially more light and are way brighter than the original incandescent lights built in.