This page was last updated in May of 2024
While I don’t have this server on a Raspberry Pi anymore (in fact, I no longer recommend it for production use)- configuring the tech stack is still very much the same regardless of the hardware it runs on.
(update, 2025: After working in enterprise IT for a while I have learned this is mediocre advice at best, really you want your server in a Docker container running something like Nginx so if your site gets slammed your whole server doesn’t get knocked offline. And if you’re gonna on-prem hosting, get a static IP or configure (i think its called) IP roaming so you don’t go offline when the ip of your home network changes. My use is weird as I have a strange mix of on-prem and cloud solutions for my whole stack. Save the hassle and don’t do that.)
Here’s a terrible diagram of what I mean:
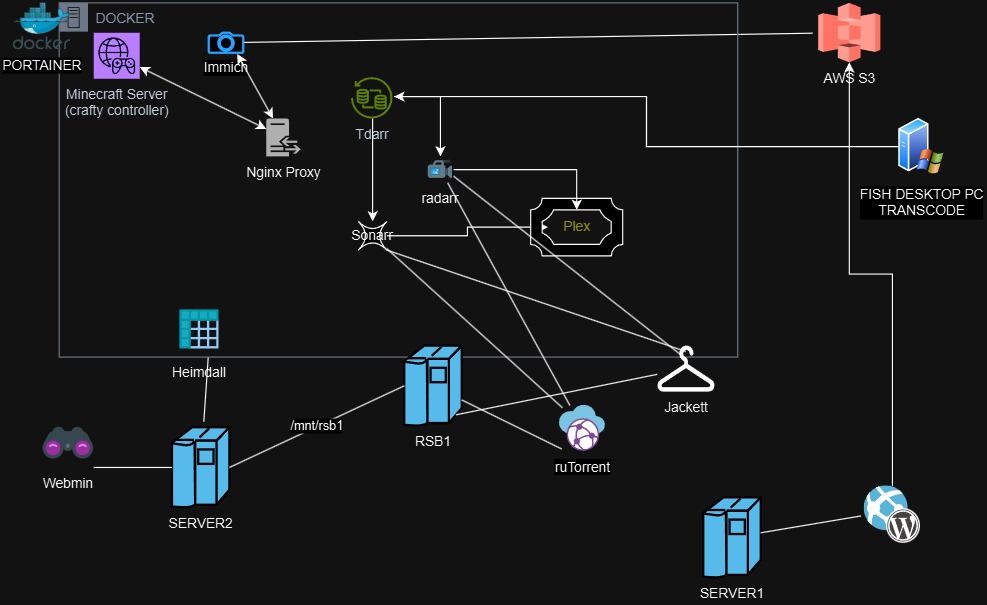
On to the original article now…
Install Ubuntu, I highly recommend using Ubuntu Server for ARM. This guide assumes you have a basic knowledge of flashing images to SD cards using programs like Etcher, and some familiarity with a Linux command line. If you don’t that’s ok, just follow the commands and everything should be fine.
1. Install Ubuntu onto your Raspberry Pi initially. Write the .img file you download to a MicroSD card using Etcher (I prefer an old version of Win32DiskImager)or similar software.
https://ubuntu-pi-flavour-maker.org/download/
You’ll need a keyboard, mouse, and monitor temporarily connected to the device for the initial install.
2. Install Open SSH for remote access.
$ sudo apt-get install -y openssh-server
3. Enable the SSH Server using systemctl
$ sudo systemctl start ssh
4. Make OpenSSH a process that starts automatically on boot so we can remote access our server “headless”.
$ sudo systemctl enable ssh.socket
These commands above enable SSH-Server from the terminal and make it auto-start on reboot. SSH allows us to remotely control a computer from the command line over the internet- not just your local network.
5. Now remotely connect to your server at it’s local IP address from another computer on the same network. You can find it’s IP address by looking at your router’s configuration page or executing “ip addr show” from terminal on the Pi. You’ll login using the username and password you setup when installing Ubuntu. To do this remotely you’ll have to forward the SSH port used then route traffic from your DNS provider through that port to the SSH server. This process not only exposes the server more if not properly configured but also is for much more advanced users.
6. Remove all unneeded programs from Ubuntu, if you’re not already using a server distribution. It’s hard for me to put together a comprehensive list for this, but in short, you need to remove: (Note, some installations come with most extras pre-removed from the distro)
- The Desktop and related functions
- All non-essential programs (FireFox, Solitare, OpenOffice, etc.
- Any power-managment utilities.
- File explorer.
7. Now install LAMP (Linux, Apache, MySQL, PHP) using this guide from DigitalOcean:
I recommend installing some other software (not yet included in this guide) to help you administer your completed server.
- vsftpd – This is a fast and light FTP server for remote filesystem access.
- Adminer or PHPMyAdmin – Adminer is a one page, lightweight MySQL database management utility. It runs as a virtual host on Apache Webserver, (for example yoursite.com/adminer). PHPMyAdmin is more feature rich, but is substantially larger and more resource intensive. It installs it’s own webserver (which is great if Apache is not working and you still need to access and manage databases). I recommend PHPMyAdmin.
- Webmin – Webmin is a full management dashboard for Linux. It has modules for controlling Apache, SSH, MySQL, and more. It can control all aspects of a Linux server from one place, but it does take up quite a few resources to run. I think the trade-off is worth the benefits, though, as so many settings are in one easy to use interface.
That’s essentially it! You have your own self-hosted website up and running.